
VS Code AI Agent Mode: Your 10-Minute Guide to Letting AI do all that pesky coding for you.
Ever wished you could just tell your computer “fix this bug” or “add a login form” and watch it happen automatically? VS Code’s Agent Mode is basically that. Unlike regular Copilot chat where you ask questions and get suggestions, Agent Mode actually rolls up its sleeves and starts making changes to your code. It’s like having an eager jr. dev who actually knows what they’re doing (sometimes).
What You’ll Need
- VS Code (you’ve got this already, right? we’re not doing install instructions here, but it’s fairly straightforward — https://code.visualstudio.com/)
- A GitHub Copilot subscription (don’t worry, there’s a free tier)
- About 10 minutes
Step 1: GitHub Copilot (If You Don’t Have It)
First things first—you need Copilot. If you’re not subscribed yet, you can snag the free plan:
- Head to GitHub Copilot’s signup page
- Sign up for the free plan (you get monthly limits, but it’s perfect for trying this out)
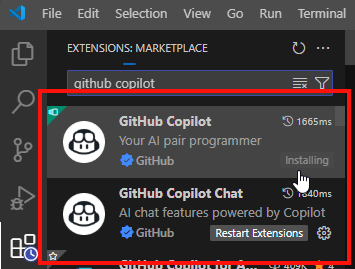
- Install the GitHub Copilot extension in VS Code if you haven’t already. In VS Code, click on the Extensions icon in the leftnav. Search for Github copilot and install the GitHub Copilot and GitHub Copilot Chat extensions

Step 2: Enable Agent Mode
Here’s where the magic happens. Agent Mode is still pretty new, so it’s hiding behind a setting:
- Open VS Code settings using (
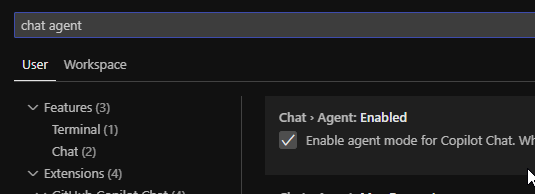
Ctrl+,orCmd+,) That’s not a typo it’s CTRL and COMMA - Search for “chat agent”
- Check the box for “Chat: Agent Enabled”
You now have Agent mode available in your Copilot chat
Step 3: Turn on Agent mode in the chat
- Open the Chat panel (
Ctrl+Shift+IorCmd+Shift+I) - Look for a dropdown at the top that probably says “Ask” or “Edit”
- Click it and select “Agent”
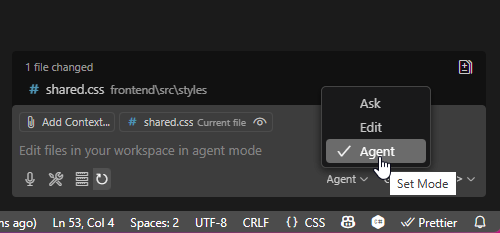
You should see the interface change slightly—this is your AI agent waiting for orders.
Step 4: Give It Something Simple to Do
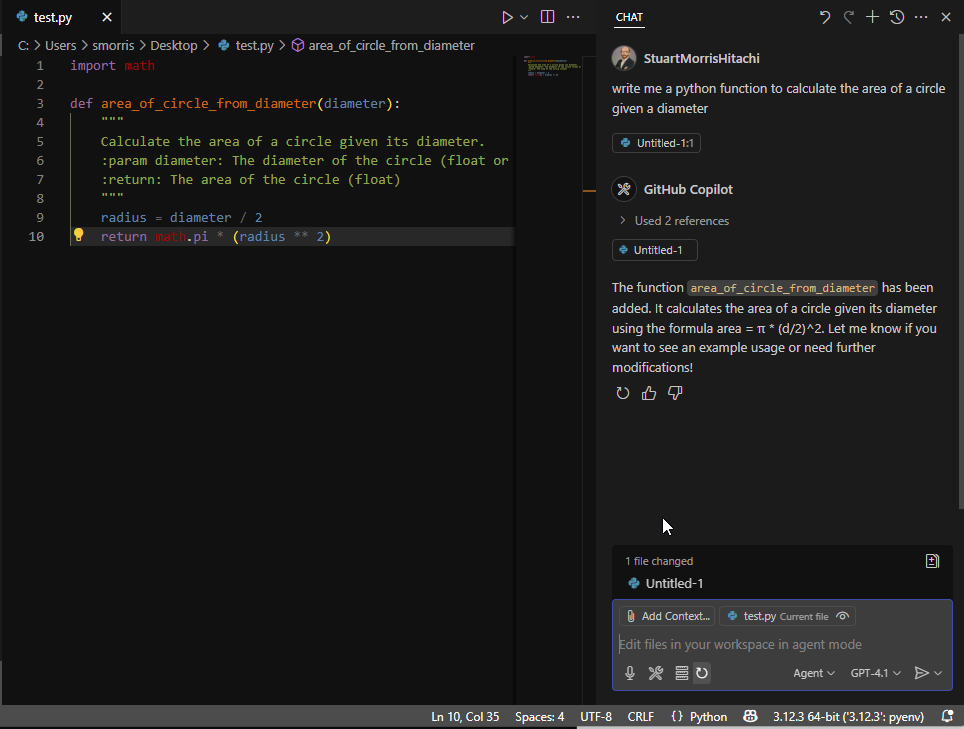
Let’s start with something straightforward. Open any JavaScript file (or create a new one) and try this prompt:
write me a python function to calculate the area of a circle given a diameterHit Enter and watch what happens.
So this is a great start, but I can do that with any chat… Let’s talk about where this Agent mode shines.
Step 5: Seriously Agentic
As I’ve discussed in the past, interacting with AI is a conversation. I can trigger Agentic interactions here with a simple followup request to the previous discussion:
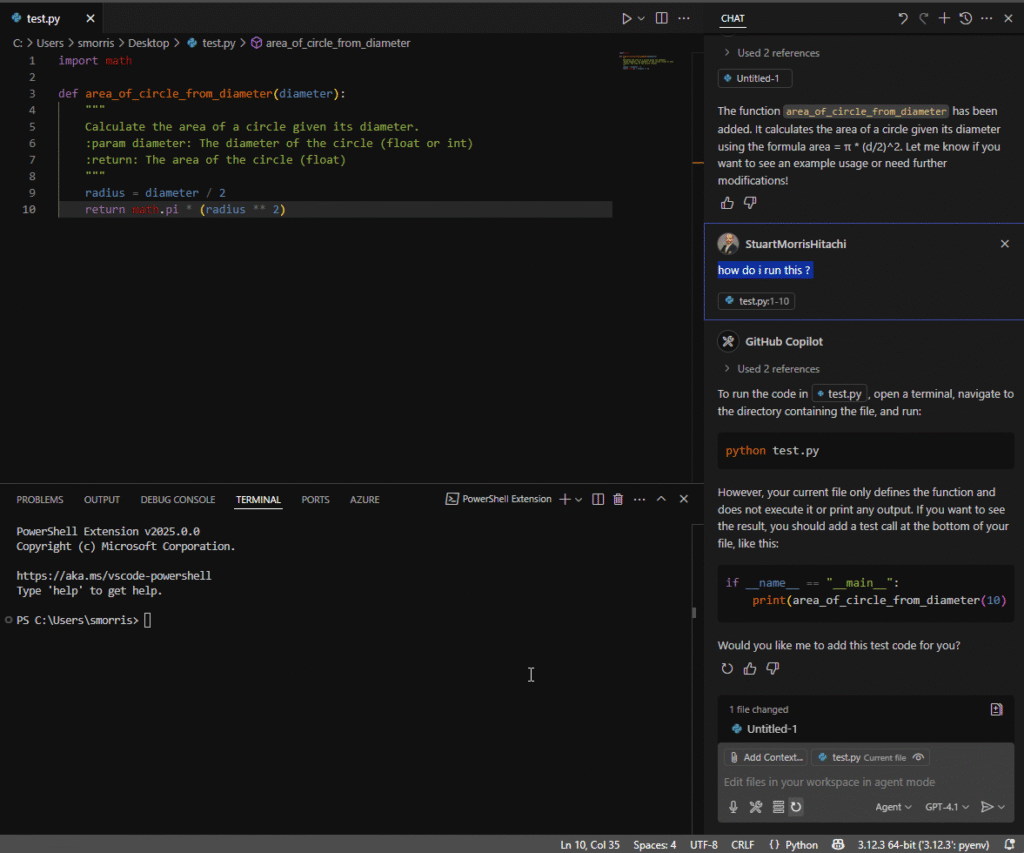
how do i run this?There are several interesting things that happen here:
- We got a function before, but that can’t be run directly, the AI reread its current code and suggested modifications to make it runnable.
- The AI also noticed that we needed some additional tooling and it OPENED the terminal screen in POWERSHELL!
- It also suggested an approach and paused for feedback with the question “Would you like me to add this test code for you?”
If the agent asks for feedback or wants you to authorize running a tool, just tell it to proceed or click “Continue” if you’re okay with it. The agent is just being polite and asking permission before it does things to your computer. It took 2 interactions for me. I confirmed that I wanted the proposed code change to be implemented, then I had to request that it show me how to run the code:
yes!can you run that?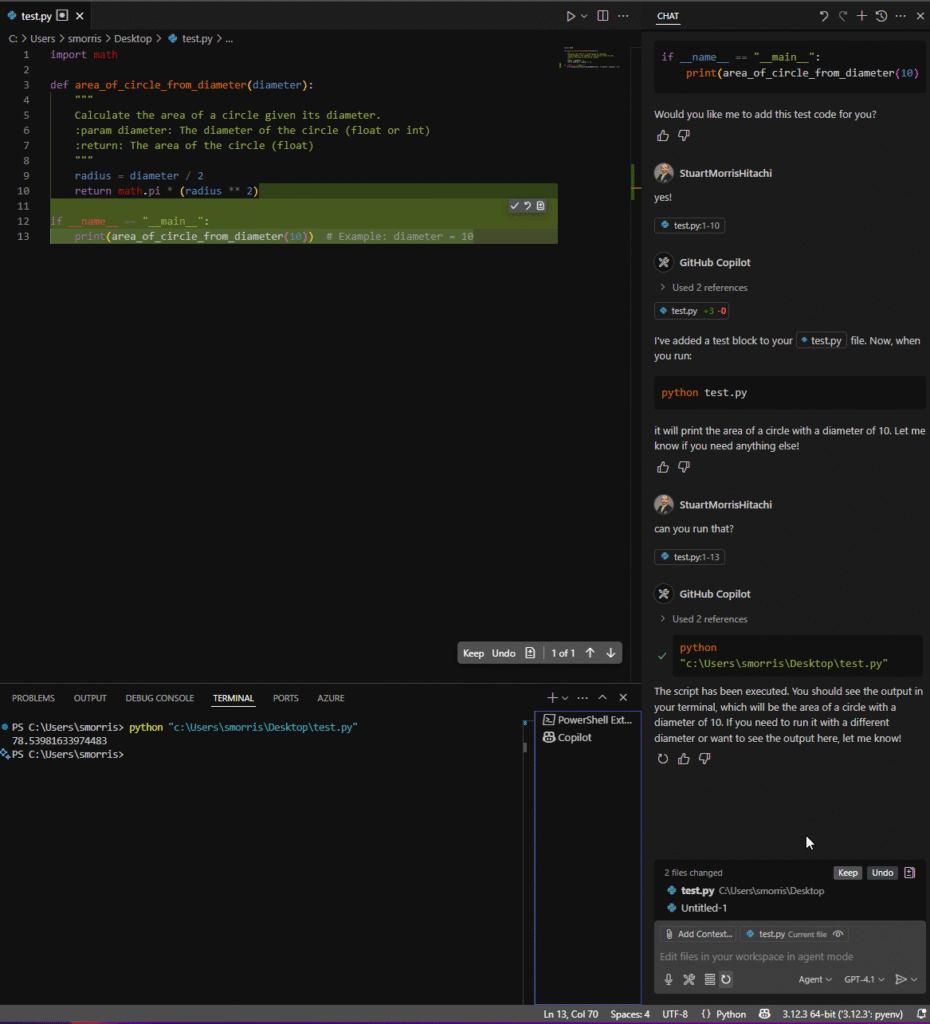

Step 6: Review What the Agent Did
After the agent finishes, you’ll see:
- Files it changed are listed in the chat panel (in bold)
- Your editor shows the new code with special highlighting
- Little controls to KEEP or UNDO the changes made. There are per file changes inside the editor and all the changes can be undone over in the chat window.
You can navigate between changes using the up/down arrows in the editor, and use the “Keep” or “Undo” buttons to accept or reject each change.
Step 7: Try Something Slightly More Complex
That’s the basics, you can ask for anything now to enhance your project. We can proceed with our circle function, or we can start editing on an existing project.
Add error handling to the circle area functionor
build a simple UX for my circle functionWatch how it figures out what files to create or modify without you having to specify anything.
Try this out on another repository or an open-source project. It’s also a great way to investigate alternative approaches that you may not have thought of in your code.
Tips for Agent Mode Success
- Be specific but not too specific: “Add input validation” works better than “validate that the input is a positive number using a try-catch block”
- Let it iterate: If something doesn’t work perfectly or isn’t what you had in mind, just tell it what’s wrong and let it fix it. If it’s gone way off the rails, UNDO and start a new chat with a different prompt variation.
Wrap Up
Agent Mode is amazing and a huge time saver for me on a lot of tasks but…:
- It’s still AI so you’ll have to review everything it does
- Complex tasks might take several iterations and may fail completely. I have definitely had to write things myself that I thought it could handle
- It uses up your Copilot request quota faster than regular chat. The paid version is well worth it here and this is one of the very few AI services that I think should be subscribed to.
- Sometimes it gets overly enthusiastic and changes more than you expected, keep the UNDO in mind 😀
This is just the beginning. Agent Mode is getting smarter and more capable with each update. So experiment, and maybe keep your repository backed up just in case your new AI buddy gets a little too creative.
Have you tried Agent Mode yet? Found any particularly clever (or hilariously wrong) things it’s done? Reach out on LinkedIn and let me know what’s working I’m always curious about other people’s AI adventures.